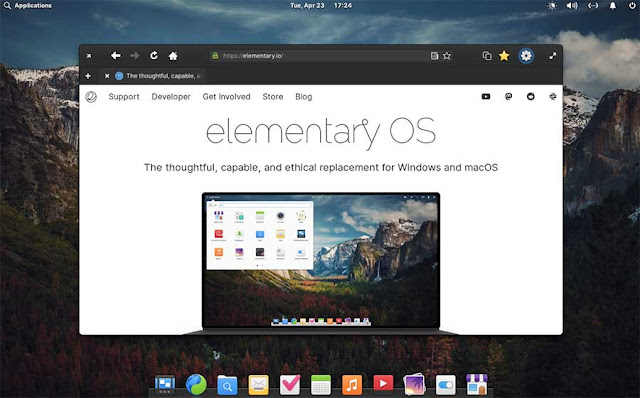
In the vast landscape of Linux distributions, elementary OS stands out as a polished and visually appealing option. Whether you’re a seasoned Linux user or a newcomer exploring open-source alternatives, elementary OS offers an experience that bridges the gap between aesthetics and functionality. elementary OS traces its roots back to Ubuntu, one of the most popular Linux distributions. However, it diverges from Ubuntu’s standard desktop environment to create something distinct. The project is driven by a small team of developers who prioritize thoughtful design, ethical choices, and user-centric experiences.
At first glance, elementary OS captivates with its clean lines, subtle animations, and attention to detail. The desktop environment, known as Pantheon, exudes elegance. Pantheon is the heart of elementary OS. It draws inspiration from macOS, emphasizing simplicity and clarity. The desktop features a dock, a top bar, a desktop menu, and a system tray. These elements seamlessly blend together, creating a cohesive and intuitive interface. Pantheon’s window management is smooth and efficient.
Users can easily switch between workspaces, maximize or minimize windows, and snap them to the edges of the screen. The result? A clutter-free workspace that encourages productivity. elementary OS ships with its own set of icons and themes, ensuring a consistent look across applications. The icons are minimalistic yet expressive, and the themes maintain a harmonious balance of light and dark elements. Instead of overwhelming users with a plethora of software choices, elementary OS provides a curated AppCenter. It’s akin to an app store, where you can discover and install applications with confidence.
Each app undergoes scrutiny to ensure quality and compatibility. Whether you’re a novice or a seasoned Linux enthusiast, elementary OS welcomes you. The design philosophy revolves around conciseness, accessible configuration, and minimal documentation. You won’t need to spend hours tweaking settings; everything just works. The Switchboard control center allows users to configure system settings without diving into complex menus. From display settings to keyboard shortcuts, it’s all neatly organized.
elementary OS takes ethics seriously. It encourages users to support the project by paying what they can. While the OS is free to download, users are encouraged to contribute financially to sustain development. This model ensures that everyone can access the system while fostering a sense of responsibility within the community. With the release of elementary OS 7.1 Horus, the developers-maintained continuity.
If you loved the previous version, you’ll appreciate the familiar interface. For newcomers, it’s an opportunity to explore a Linux distribution that combines aesthetics, functionality, and ethical principles. elementary OS is more than just a Linux distribution; it’s a testament to thoughtful design and user-centric development. Whether you’re an artist seeking inspiration or a pragmatic user looking for a reliable system, elementary OS invites you to experience the best of both worlds.
Installing Elementary OS: Quick and Easy
Here’s a step-by-step guide on how to install elementary OS version 7.1:
- Download Elementary OS 7.1 - Visit the official Elementary OS website and download the ISO file for Elementary OS 7.1. You can choose to pay what you want or download it for free.
- Create a Bootable USB Drive - To create an installation drive, you’ll need a USB flash drive with at least 4 GB of capacity. Download and install a program like Etcher or Rufus to create a bootable USB drive. Open the application, select the downloaded ISO file, and choose your USB drive as the target. Click the “Flash!” or “Start” button to begin the process.
- Boot From the USB Drive - Insert the bootable USB drive into the computer where you want to install Elementary OS. Restart the computer and press the key to access the boot menu, usually F12, Esc, or another function key. Select the USB drive from the list of bootable devices.
- Begin the Installation Process - Once booted from the USB drive, you will be greeted with the Elementary OS welcome screen. Choose your preferred language and keyboard layout. You can opt to try Elementary OS without installing by selecting “Try Demo Mode” or proceed with the installation.
- Disk Partitioning - If you’re comfortable with partitioning, select “Custom Install (Advanced)” to create and manage partitions manually. For a simpler installation, choose “Erase Disk and Install” to let the installer automatically partition your drive. If you choose custom partitioning, you’ll need to create partitions for root, home, and swap.
- Installation and User Setup - Follow the on-screen instructions to configure your installation settings. You’ll be asked to create a user account with a username and password. The installer will then proceed to install Elementary OS on your computer.
- Finalize the Installation - Once the installation is complete, you’ll be prompted to restart your computer. Remove the USB drive when instructed. Upon rebooting, you’ll be able to log in to your new Elementary OS 7.1 installation.
- Post-Installation Setup - After logging in, take some time to explore the settings and customize your new OS. You may want to update your system and install additional software from the AppCenter.
Remember to back up any important data before starting
the installation process, as it may overwrite existing data on the disk. Also,
ensure that your computer meets the recommended system specifications for the best
experience with elementary OS 7.1. Also, you can check out a video tutorial
demonstrating the entire process.
Elementary OS: First Look After Installation
After installing the elementary OS distribution and booting it up for the first time, in most cases, you won't need to adjust your screen resolution. When using a virtual machine like VMware Workstation Player, whenever you resize the virtual application, the display of your screen in the elementary OS distribution will automatically adjust accordingly. In most other Linux distributions, you would get horizontal and vertical bars within the VMware Workstation Player window until the desktop size changes. However, if this isn't the case for you due to some anomaly, simply click on the icon System Settings. This is where you can set up almost anything you want to change in the elementary OS distribution in a simple way.
$ sudo apt update
Enter the password you set during installation, then type
the following command:
$ sudo apt upgrade
This way, you have performed an update of your elementary OS distribution.
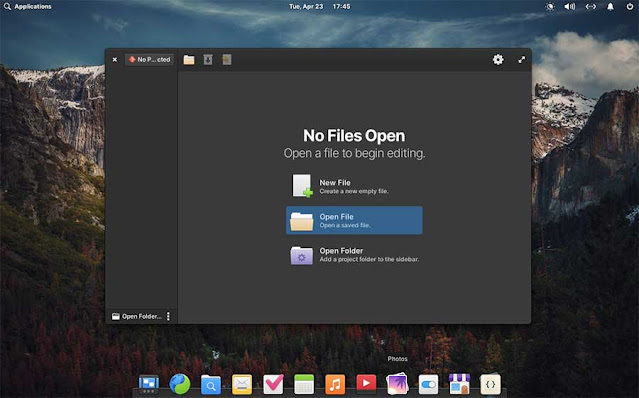
Code is a text-based code editor designed to be simple, intuitive and functional. Made with attention to users and their needs. It has a clean design and provides the basic functionality needed to write and edit code. Code automatically saves your work to avoid data loss. You can organize your projects in folders. It supports Git for code versioning. Automatically maintains proper spacing in code. You can use EditorConfig files to format your code consistently. Code supports extensions like Markdown shortcuts and Vim emulation etc.
AppCenter in elementary OS 7.1 is not the same as the Ubuntu Software Center, any more. AppCenter is the official app store for elementary OS. It serves as a central hub for discovering, installing, and managing applications on your system. Unlike the Ubuntu Software Center, AppCenter is specifically designed for elementary OS and integrates seamlessly with its desktop environment. AppCenter offers a selection of curated apps that have been reviewed and approved by the elementary team. These apps are open source and ensure a native, privacy-respecting, and secure experience.
AppCenter follows a pay-what-you-can model, allowing users to contribute financially to app developers based on their preference. Apps in AppCenter are packaged using Flatpak, which provides security features. AppCenter informs users when apps want to access their location, send notifications, or automatically start and run in the background without explicit consent.


No comments:
Post a Comment